

Do five things now, in this order: identify the customer, verify their identity, assess the risk, apply standard, simplified, or enhanced due diligence depending on that score, then monitor the relationship on an ongoing basis. Front-office or onboarding staff typically own identification and evidence capture; compliance owns risk-scoring and enhanced due diligence decisions; a screening vendor supports the verification and watchlist checks in between.
The sequence matters as much as the steps. Under the UK Money Laundering Regulations, identity verification must generally happen before the business relationship is established, not retrofitted afterwards, and AUSTRAC applies the same logic: initial customer due diligence steps must be finished before a designated service is provided, with only narrow, documented exceptions.
- Identify — capture name, date of birth, address, and legal entity details.
- Verify — corroborate that identity against a reliable, independent source.
- Risk assess — score the customer by type, geography, product, and channel.
- Apply the right track — simplified due diligence (SDD), standard CDD, or enhanced due diligence (EDD).
- Monitor and record — track behaviour against expectations and keep an audit trail.
Key Takeaways
Effective customer due diligence depends on completing identification and verification before onboarding, tiering risk consistently, and documenting the rationale behind every decision.
| Point | Details |
|---|---|
| Verify before onboarding | Complete identity verification before providing the service, with only narrow, documented exceptions. |
| Map beneficial ownership fully | Identify anyone holding a substantial portion, plus anyone exercising effective control, not just the top layer. |
| Score risk consistently | Use a defined matrix across customer type, geography, product, and channel to select SDD, CDD, or EDD. |
| Monitor on a cadence matched to risk | Review high-risk files annually, medium risk every one to two years, low risk every three to five years. |
| Document the reasoning, not just the evidence | Store a written rationale for every risk tier decision alongside the underlying documents. |
| Get help choosing the right technology | Aithea supports compliance teams with vendor evaluation, RFP design, and explainable decision logs for CDD workflows. |
Table of Contents
- Initial CDD for individuals: what to collect and how to verify it
- Beneficial ownership: verifying legal entities and controlling persons
- How do you decide between SDD, CDD, and EDD?
- Ongoing monitoring: what triggers a fresh review
- Which digital identity and screening tools actually help?
- Record keeping and building an audit-ready file
- A step-by-step onboarding checklist you can adapt
- Making CDD automation actually stand up to audit
- Where compliance teams actually go wrong
- How Aithea helps you put this checklist into practice
- Sources
- FAQ
Initial CDD for individuals: what to collect and how to verify it
Every customer due diligence process for a natural person starts with the same four data points: full legal name, date of birth, residential address, and government-issued identification with its expiry date. Miss one field at onboarding and you are almost guaranteed to be chasing it later, usually at the worst possible moment, mid-transaction, when the customer has gone quiet.
The FinCEN CDD Rule frames this as understanding the customer relationship well enough to build a workable risk profile, not simply filing a passport copy. HMRC's guidance on identity documents pushes the same point: verification has to actually corroborate the claimed identity, not just tick a box that a document was seen.
What counts as acceptable evidence:
- A current passport, national ID card, or driving licence, checked for tampering and validity against the expiry date.
- A recent utility bill, bank statement, or government correspondence confirming the residential address, ideally within the last three months.
- Electronic verification: document OCR extraction cross-checked against issuing-authority databases, plus liveness biometrics to confirm the presenting person matches the document photo.
- Corroboration through an existing bank account in the customer's name, which offers a useful secondary signal for remote onboarding.
For remote or digital onboarding, layering matters more than any single check. A document scan alone is weak evidence; a document scan plus a liveness check plus a database match against a credit file or electoral register is considerably stronger. Watch for classic fraud indicators too: addresses that don't match utility records, documents issued in jurisdictions inconsistent with the customer's stated history, or identity details that were only just created (a common feature of synthetic identity fraud). Log every check performed, the result, the timestamp, and who or what system ran it, because that log is what an auditor asks for six months later, not the document itself.
Pro Tip: Store the verification method alongside the result, not just the outcome. "Passport verified" tells an auditor nothing; "passport verified via OCR extraction and liveness match, cross-checked against issuing database" tells them everything they need.

Beneficial ownership: verifying legal entities and controlling persons
Corporate customers introduce a layer of complexity individuals don't: you're verifying not just the entity but the humans who actually stand behind it. The FinCEN CDD Rule makes this explicit, requiring covered institutions to identify and verify beneficial owners of legal-entity customers, not merely the entity's registered name and number.
Start by requesting the paperwork that establishes the entity's legal existence and structure:
- Certificate of incorporation and registration number.
- Articles of association or equivalent constitutional documents.
- A current shareholder or member register.
- Details of directors and authorised signatories.
From there, map ownership to find anyone holding a substantial portion of shares or voting rights, plus anyone who exercises effective control regardless of formal shareholding, a nominee director acting on someone else's instructions, for instance. HMRC's AMLG11300 guidance sets out the operational detail for source of funds and beneficial ownership checks that sit behind this mapping exercise.
Each identified beneficial owner then goes through the same individual verification steps as any natural person, and each authorised signatory needs a mandate check confirming they can actually bind the entity. When ownership is deliberately obscured through layered holding structures or nominee arrangements you cannot unwind, escalate to senior compliance review rather than guessing. The outcome should be one of three: verified and accepted, accepted with restrictions pending further evidence, or declined.
How do you decide between SDD, CDD, and EDD?
Risk tiering is the decision engine that determines everything downstream, and getting it wrong in either direction creates problems. Score too many customers as low risk and you miss genuine exposure; score everyone as high risk and your EDD team drowns in files that never needed the extra scrutiny.
A workable scoring matrix weighs five factors: customer type (individual, SME, complex trust structure), geography (domestic versus high-risk third country), product (a basic current account versus trade finance), channel (face-to-face versus fully remote), and expected transaction profile (modest, predictable flows versus large, irregular ones). Score each factor and sum the total against defined bands.
- Low risk → simplified due diligence, often applied to public bodies or listed companies with transparent ownership.
- Medium risk → standard CDD, the default track for most retail and SME relationships.
- High risk → enhanced due diligence, triggered automatically once a threshold score is crossed.
- Restricted → decline or exit, reserved for cases where risk cannot be adequately mitigated.
EDD kicks in automatically for politically exposed persons (PEPs), any sanctions or adverse media hit, and customers connected to jurisdictions the Financial Action Task Force or equivalent EU list flags as high risk. That means digging into source of wealth and source of funds, seeking senior management sign-off before onboarding, and setting a tighter monitoring cadence from day one.
One structural point regulators keep coming back to: the FinCEN CDD Rule frames ongoing risk profiling as a core, standing obligation, not a one-off onboarding gate. Every high-risk decision needs a written rationale explaining why that tier was chosen and what mitigation sits around it, not just the score itself. That documented reasoning, more than the document evidence, is what separates a defensible file from one that collapses under audit pressure.
Ongoing monitoring: what triggers a fresh review
CDD is not a document you file once and forget; understanding the nuances of online bank compliance for high-net-worth clients is essential to managing ongoing risks effectively. It's a live relationship you keep testing against expectations, and AUSTRAC's guidance is explicit that keeping KYC information current through ongoing monitoring is as central to the CDD process as the initial checks.
- Set behaviour-based triggers, not just transaction-value thresholds: a dormant account suddenly moving large sums, transaction patterns inconsistent with the stated business purpose, or a sudden shift to jurisdictions with no obvious commercial link.
- Trigger immediate re-CDD the moment a customer's status changes materially: a new PEP designation, a sanctions list hit, adverse media appearing overnight, or ownership changes at the entity level.
- Apply a review cadence matched to risk tier: annually for high-risk relationships, every one to two years for medium risk, and every three to five years for low risk, with any trigger event overriding the scheduled date.
- Record every review outcome in the case file, including who conducted it and what, if anything, changed.
- Escalate promptly when a pattern looks like it warrants a Suspicious Activity Report, rather than letting it sit in a queue while the transaction window closes.
Which digital identity and screening tools actually help?
Electronic verification has genuinely closed the gap between speed and rigour in most onboarding functions, but only when the underlying checks are layered rather than relied on individually. Document OCR extracts data from an ID automatically; biometric liveness confirms a real person is present, not a photograph or deepfake; and corroboration against phone, email, or device data adds a further signal that's hard to fake at scale.
On the screening side, four European-facing tools dominate practitioner shortlists for PEP and sanctions checks:
- Refinitiv World-Check — a long-established structured risk intelligence database widely used for PEP, sanctions, and adverse media screening across large financial institutions.
- Dow Jones Risk & Compliance — combines watchlist data with editorial adverse media research, useful where narrative context matters as much as the match itself.
- LexisNexis Bridger Insight — built around configurable matching logic, often chosen where institutions need to tune sensitivity to reduce false positives at scale.
- ComplyAdvantage — an API-first, data-driven platform popular with fintechs and digital-first institutions needing faster integration into onboarding flows.
None of these tools replace human judgement; they generate matches that still need a trained analyst to confirm or dismiss. Combining vendor screening with in-house checks, and applying tuned matching thresholds to cut false-positive volume, is what keeps a screening programme usable rather than a bottleneck. Before onboarding any vendor, check its standing against a recognised framework such as the UK's digital verification services trust register, which sets expectations for how digital identity providers should operate under money laundering regulations.
Record keeping and building an audit-ready file
An examiner doesn't just want to see that a customer was verified; they want to see why the risk tier was chosen and what happened next. That means keeping identity evidence, verification outputs, screening results, the risk score itself, the documented rationale behind it, approval sign-offs, and timestamps, all in one retrievable case file.
- Retain records for a defined period after the relationship ends, commonly cited around five to seven years, though the exact figure depends on jurisdictional rules you should confirm locally.
- Write the rationale as a narrative: who checked what, why this risk tier fits the evidence, and what mitigation controls apply.
- Underpin the file with governance: written SOPs, clear role definitions, training records, and periodic testing of the controls themselves, all of which Aithea's compliance policy resources address in more operational detail.
Pro Tip: Write the risk rationale as if a regulator with no prior context will read it in isolation two years from now. If it doesn't stand alone, it isn't audit-ready yet.
A step-by-step onboarding checklist you can adapt
A workable onboarding workflow moves through six stages, each with a named owner and a target turnaround:
- Capture — front office collects identity data and documents (target: same day).
- Verify — compliance or an automated verification tool confirms authenticity (target: 24 to 48 hours).
- Screen — PEP, sanctions, and adverse media checks run against a screening vendor (target: same day as verification).
- Risk score — compliance applies the scoring matrix and assigns a tier (target: within 24 hours of screening).
- Decision — accept, accept with conditions (enhanced monitoring, transaction caps), or decline, with senior sign-off required for high-risk accepts.
- Record — the full file, rationale, and approvals are saved to the case management system before the relationship goes live.
Automated vendor checks handle the volume, matching documents, running screening, flagging anomalies, but manual review points still belong at the risk-scoring and decision stages, where judgement genuinely matters. A decline or conditional accept should always carry the same depth of documented rationale as a straightforward approval; regulators scrutinise the edge cases hardest.
Making CDD automation actually stand up to audit
Automation earns its place in a CDD programme when it removes friction without removing the paper trail. An automated trigger that fires EDD the moment a screening hit or high-risk score appears cuts the timing gap between "we should have escalated" and "we did escalate", which is precisely where onboarding risk tends to hide.
- Build triggers around defined risk thresholds, not vague judgement calls, so the same input always produces the same escalation.
- Capture explainable logs at every automated decision point: what rule fired, what data triggered it, what the system recommended.
- Keep a human reviewing adverse media and complex entity structures; pattern-matching tools are weak where nuance and local context matter most.
- Evaluate screening vendors through a structured RFP process, checking match logic, false-positive rates, and data refresh frequency before committing, a discipline Aithea's technology selection guidance is built around.
Pro Tip: Ask any vendor demonstrating a screening tool to show you a false positive it correctly dismissed, not just a true positive it caught. That's where the real operational cost lives.
Where compliance teams actually go wrong
Most CDD failures I see aren't about missing documents. They're about missing reasoning: a file with a passport scan but no note explaining why the customer was scored medium rather than high. Inconsistent entity checks are the second culprit, one analyst mapping beneficial ownership properly, another stopping at the first layer of a holding structure.
The quickest fixes cost little: make key fields mandatory before a case can progress, automate evidence capture so nothing depends on someone remembering to upload it, and set firm escalation SLAs so false positives don't sit unresolved for weeks. None of this requires a platform overhaul, just enforcing the discipline the rules already demand.
How Aithea helps you put this checklist into practice
Building a CDD process that survives an audit is one thing; choosing the technology and workflow design that keeps it running smoothly is another. Aithea works with compliance teams on exactly that gap, matching institutions to screening and identity verification vendors through a structured evaluation process, supporting RFPs for CDD and EDD technology, and helping teams build explainable, audit-ready decision logs around whatever platform they choose.

If your team is weighing a new screening provider, rebuilding onboarding SOPs, or simply wants a second opinion on where your current process leaves gaps, Aithea's compliance and risk consulting service is built for that conversation. Explore how AI and automation are reshaping the wider financial crime landscape that CDD sits within, or get in touch directly to book a technology selection review.
Sources
FAQ
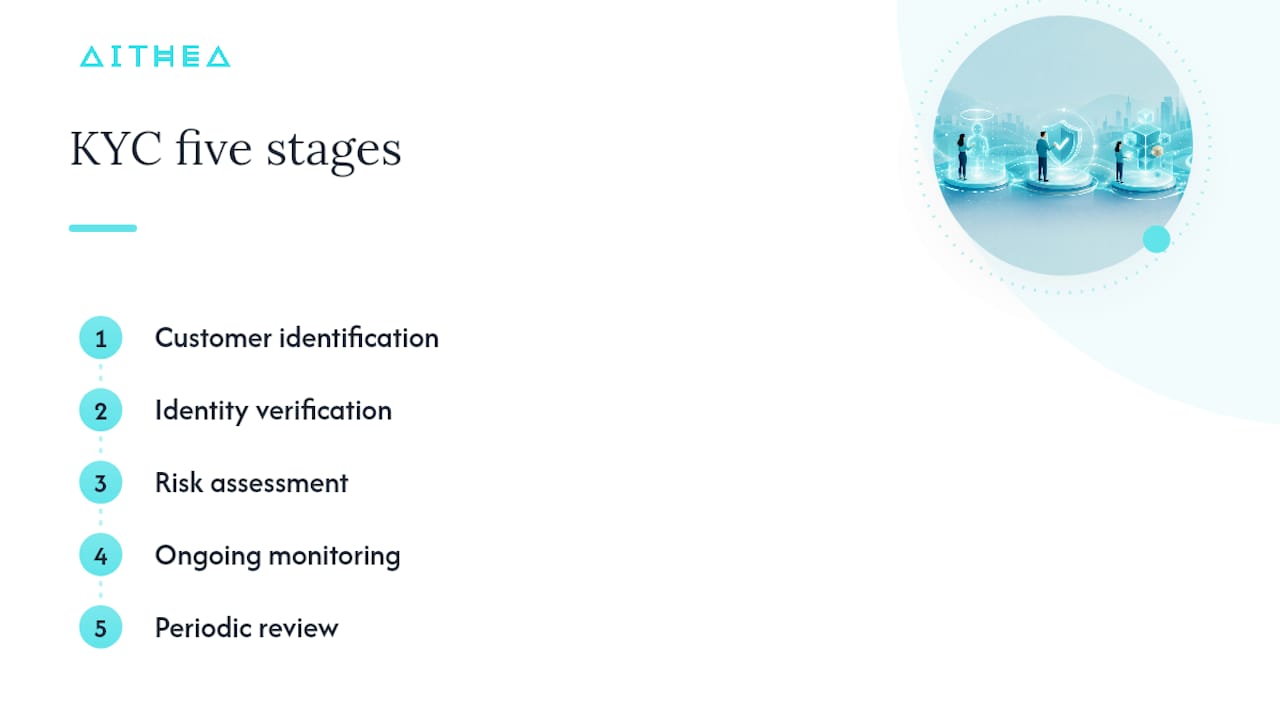
What are the five stages of KYC?
Most frameworks describe five stages: customer identification, identity verification, risk assessment, ongoing monitoring, and periodic review, mirroring the FinCEN CDD Rule's core requirements.
What is a CDD checklist?
A CDD checklist is the ordered set of steps and evidence a compliance team follows to identify a customer, verify their identity, assess risk, and decide between SDD, standard CDD, or EDD before onboarding.
What is the difference between KYC, CDD, and EDD?
KYC is the broad umbrella term for knowing your customer; CDD is the standard set of identification and risk-assessment steps applied to most relationships; EDD is the deeper, additional scrutiny required for PEPs, sanctions hits, or high-risk jurisdictions.
What are the four pillars of CDD?
Under the FinCEN CDD Rule, the four pillars are identifying and verifying customers, identifying and verifying beneficial owners, understanding the nature and purpose of the relationship, and conducting ongoing monitoring.
When should enhanced due diligence be applied instead of standard CDD?
Enhanced due diligence applies automatically once a customer triggers a PEP status, a sanctions or adverse media hit, or a connection to a high-risk jurisdiction, requiring deeper source of funds checks and senior management approval.